User-Defined Build Settings (Easy Steps and Code Cover) | Xcode Project Setup Series
This article shows how to define and access user-defined settings.
If you still haven’t read my previous article <How to create a new build configuration file>, I encourage you to do so, as you will get a better understanding of what this article is about and where the whole series is heading.
How to Create Build Configuration File in Xcode | Xcode Project Setup Series
Define a new user-defined build setting.
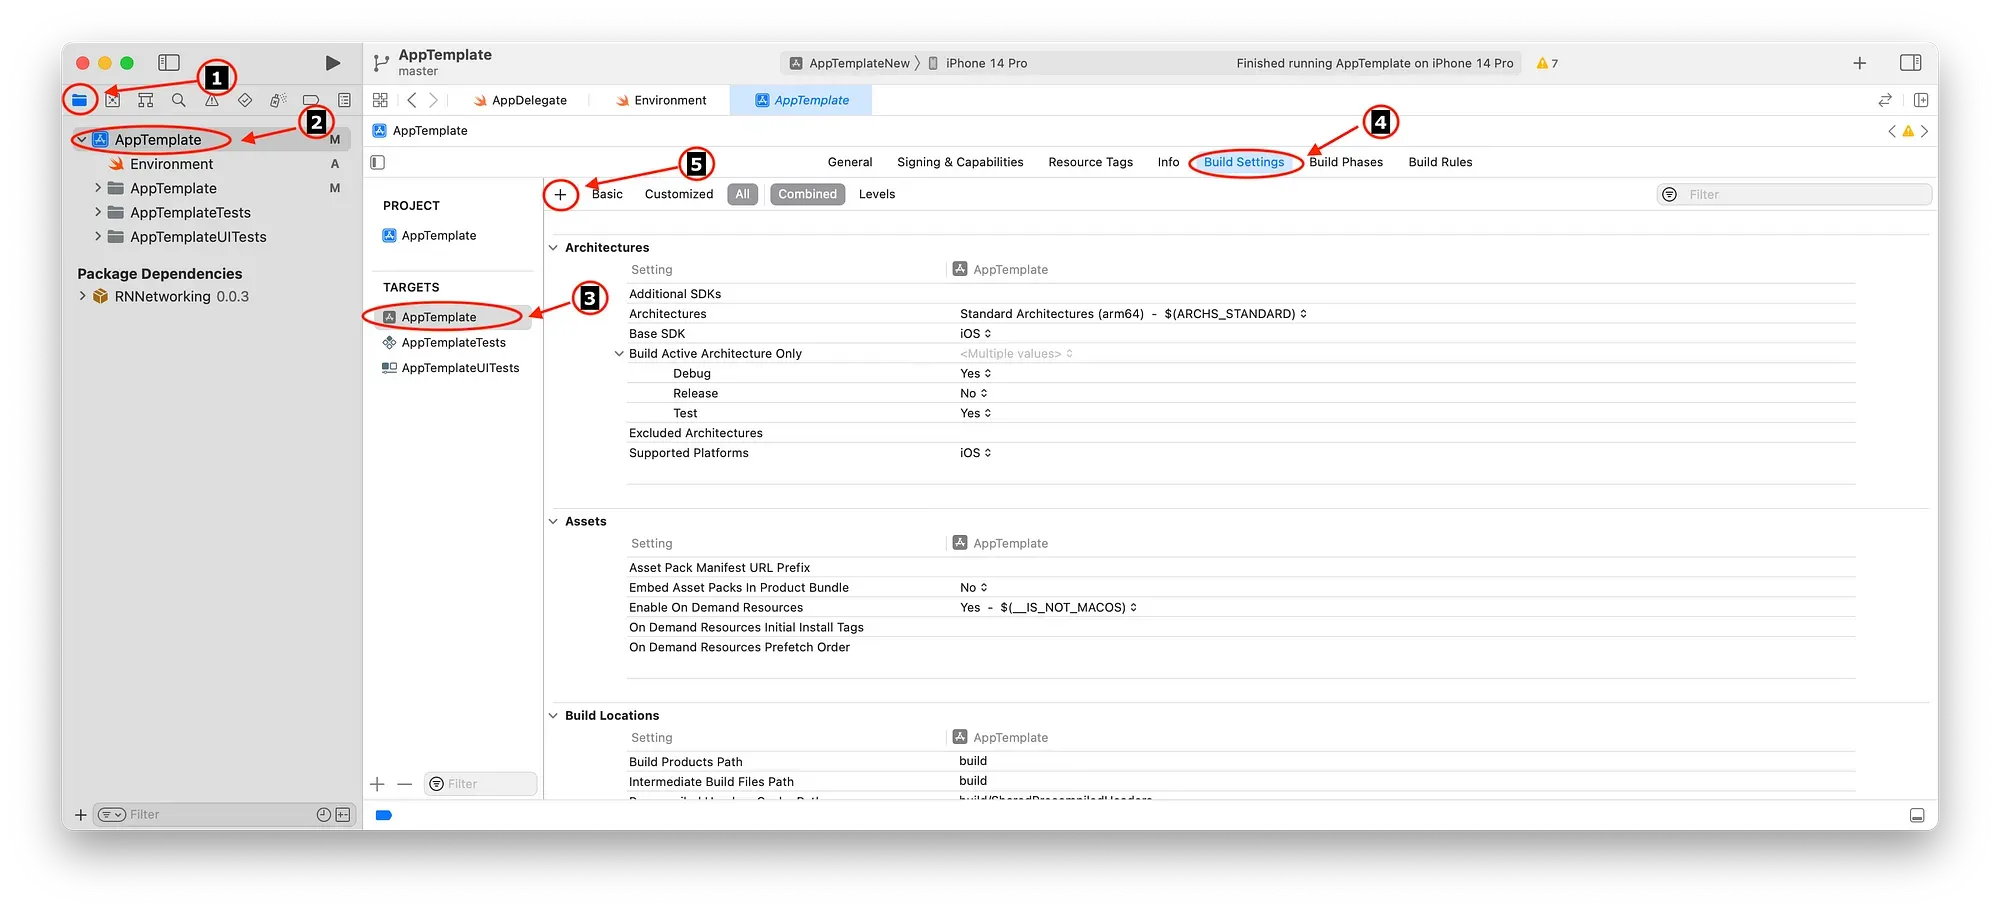
After successfully going through the creation of your Xcode project:
- Click on the project navigator (that little folder icon)
- Click on your project in the “Project Navigator”
- Select your target on the project and targets list
- Make sure the ‘Build Settings’ tab is selected
- Click on the “+” button
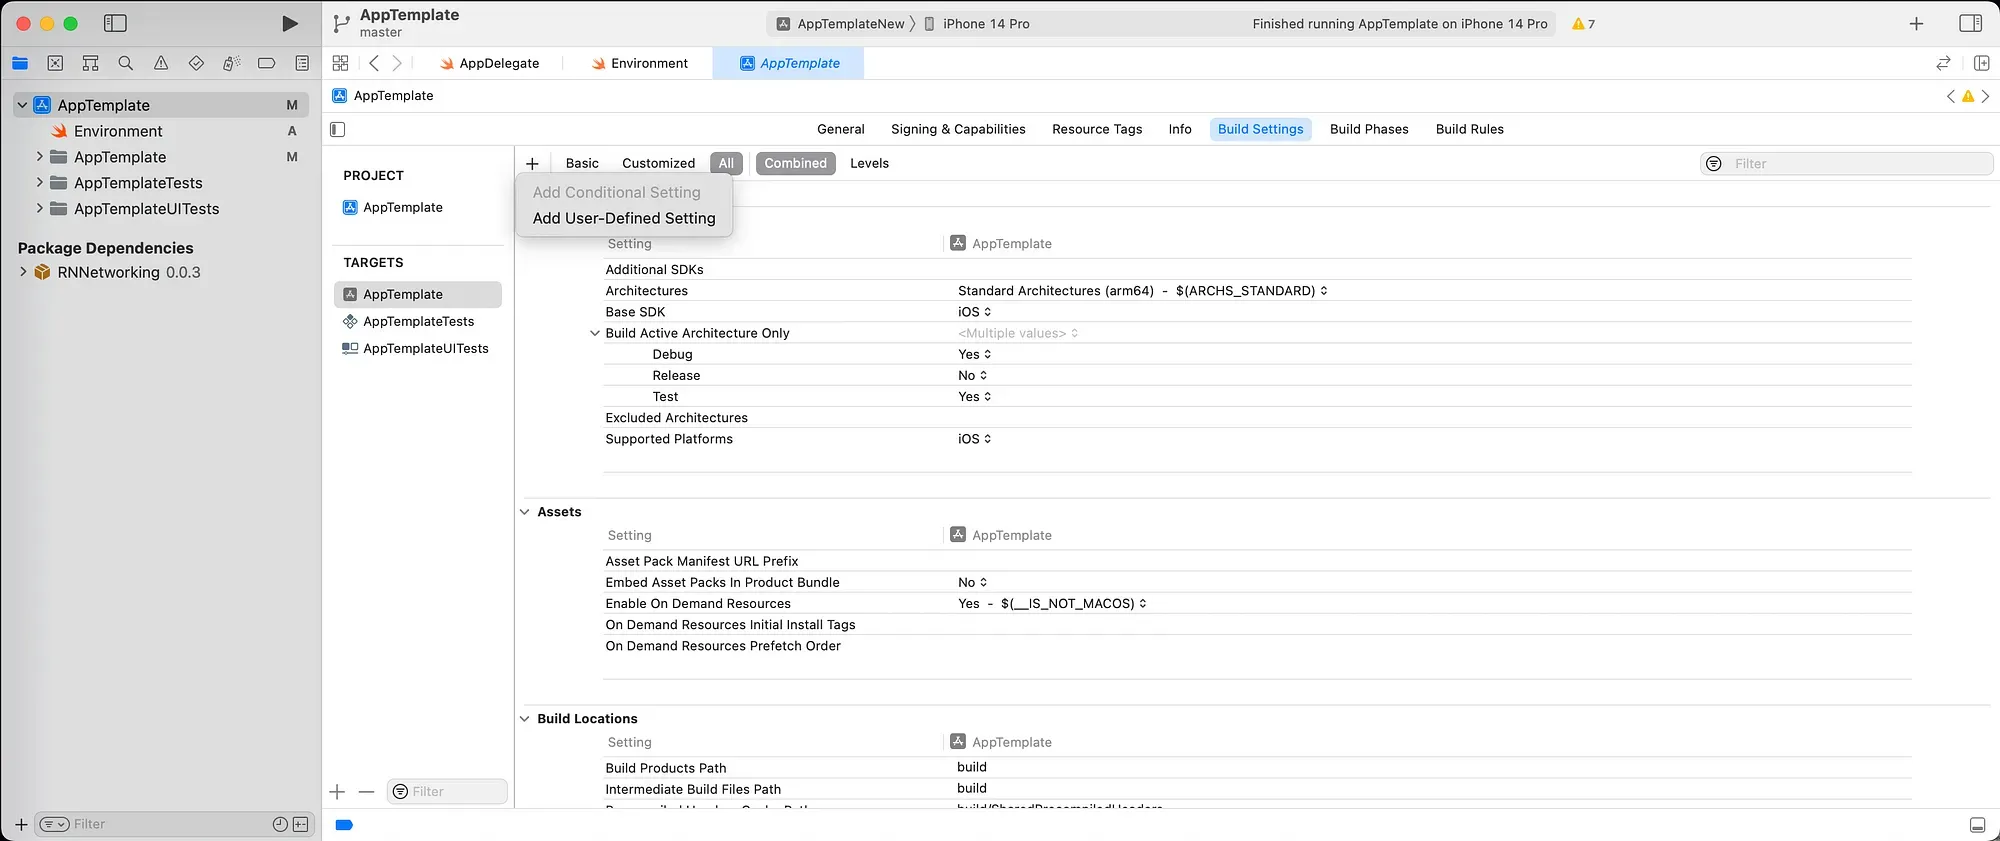
Click on “Add User-Defined Setting” on the popup-menu
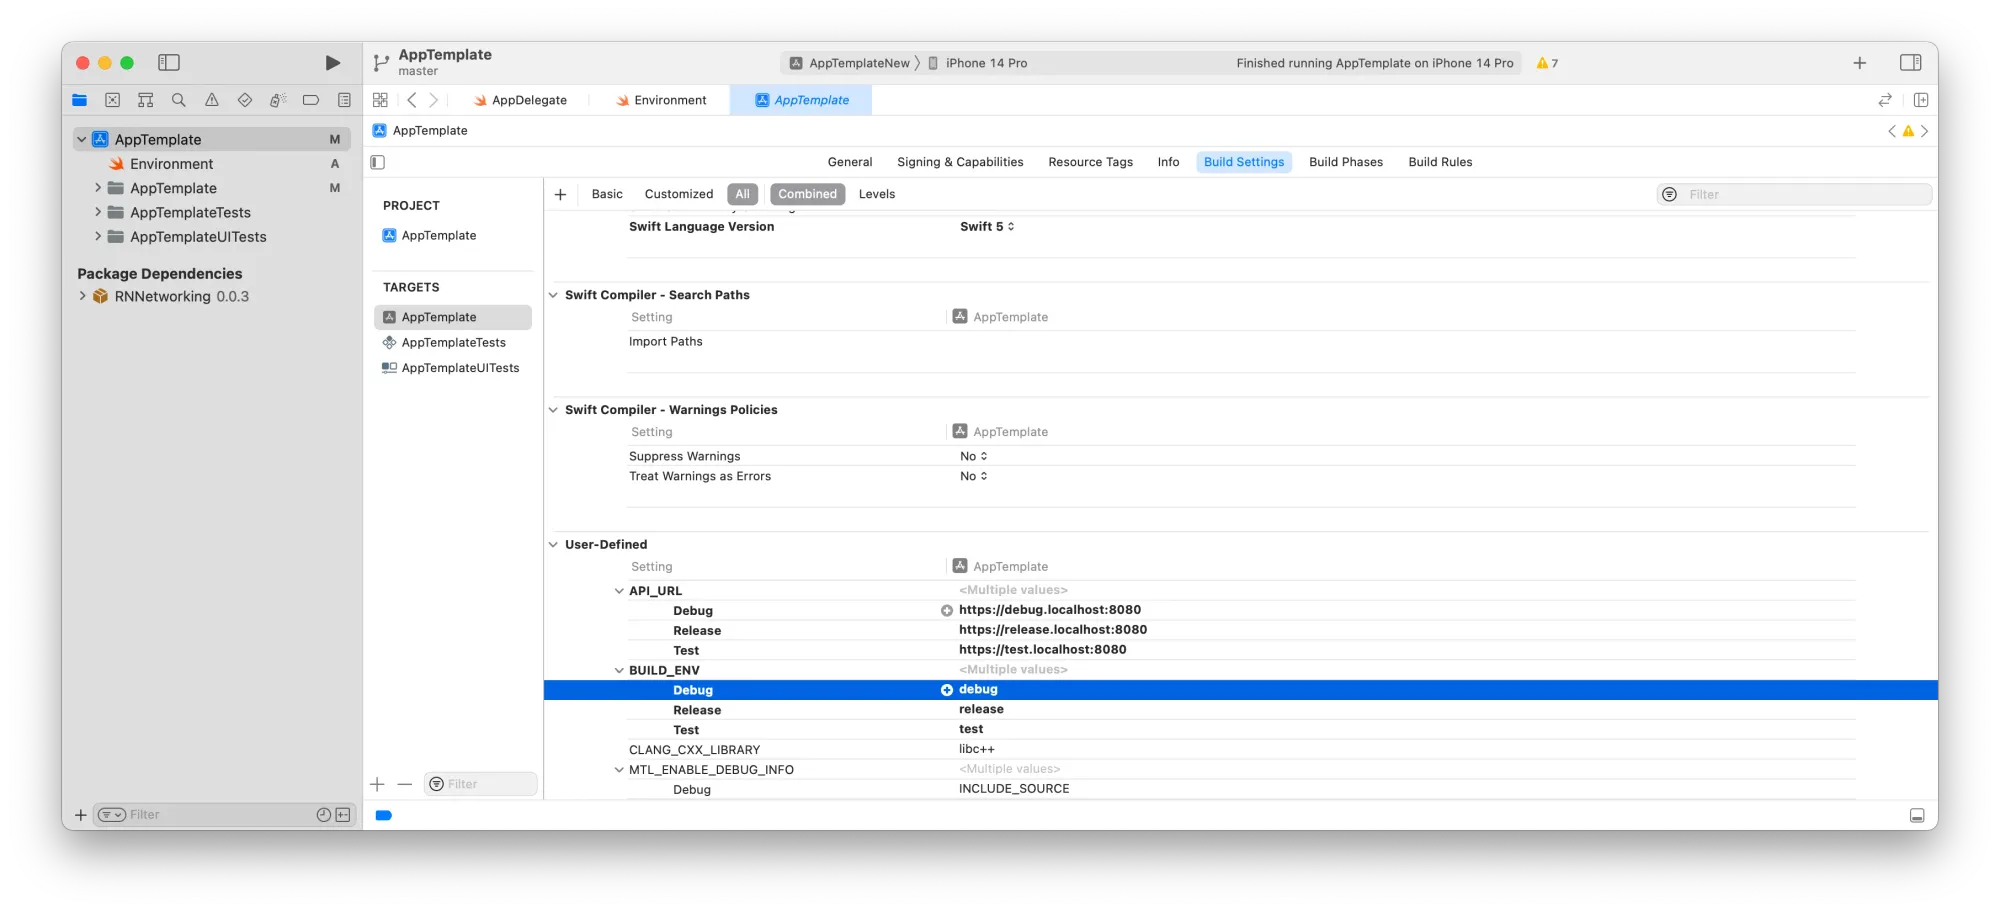
If everything went according to the plan, you should have been navigated to the “User-Defined” section by now. Did you notice that I added a couple of settings there?
- API_URL
- BUILD_ENV
You will also notice that, for every build configuration, a different value was defined. You can go and do the same. From here on, I will only use BUILD_ENV for the sake of simplicity but also to keep this article short.
Notify Info.plist about the new “User-Defined” values
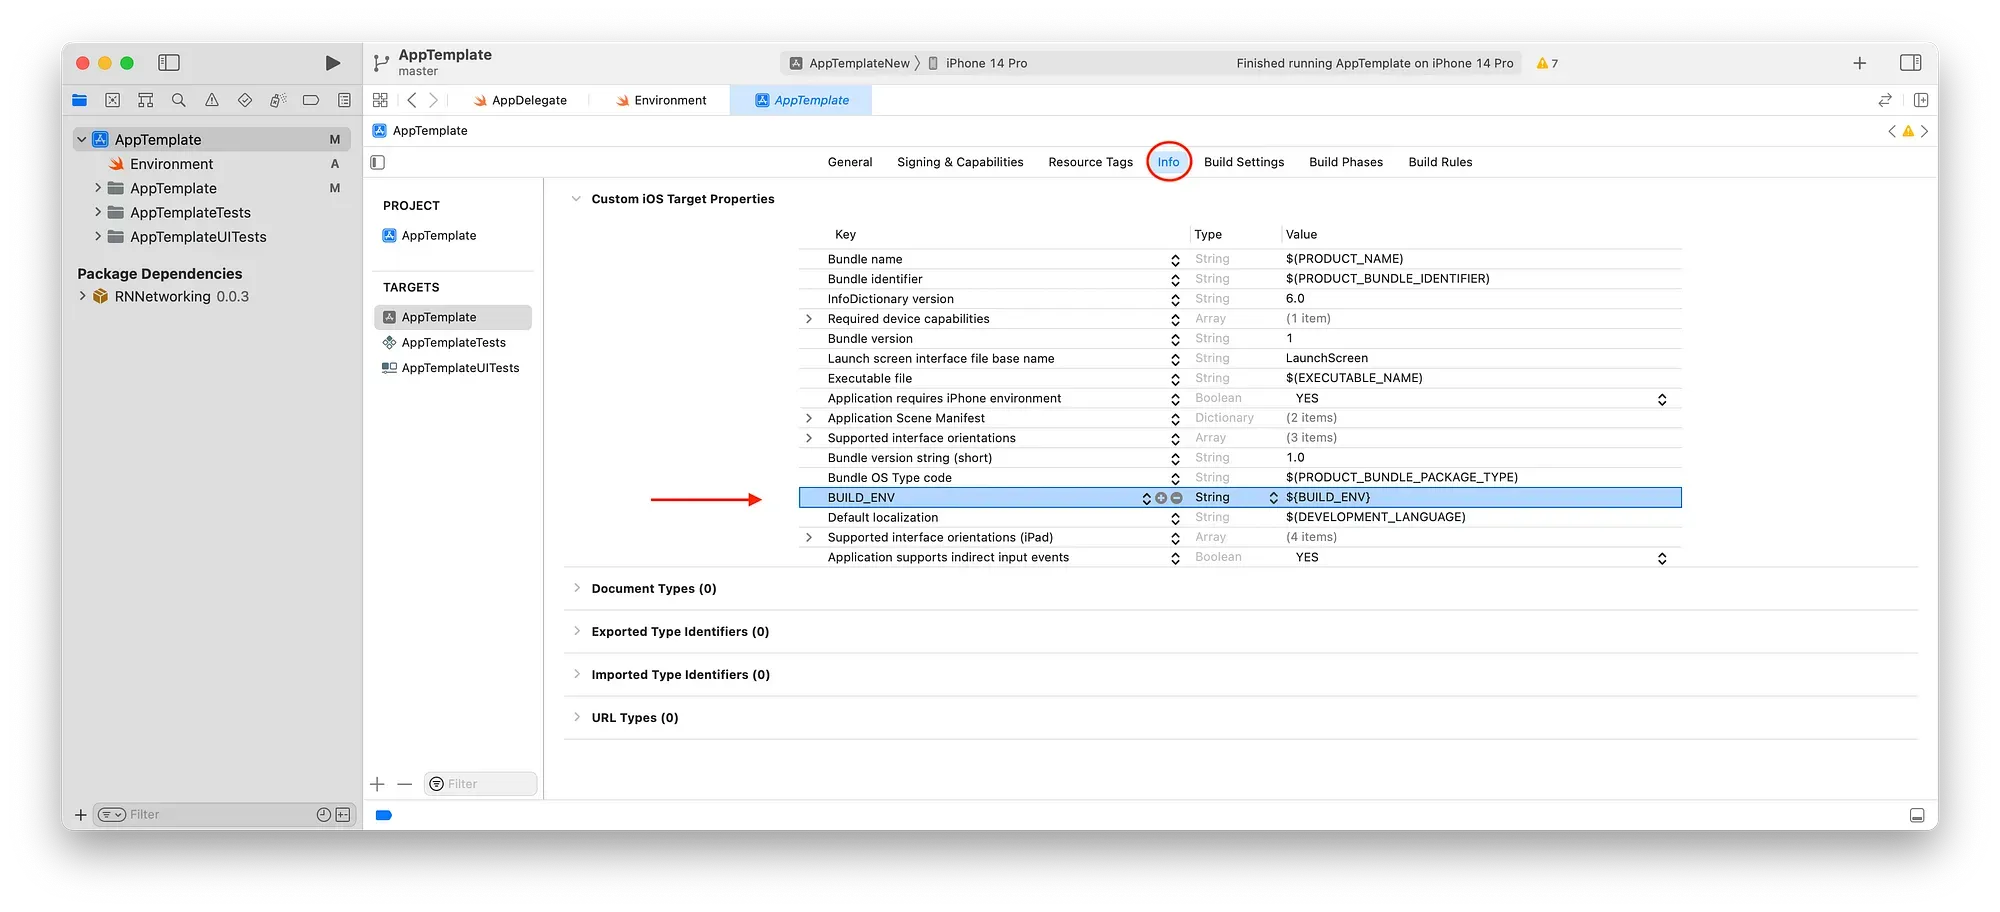
Xcode 14 and on
If you are still on the “Build Settings” tag, just click on the “Info” one which should be on the left.
Xcode 13 and prior
You will find Info.plist in your ‘Project Navigator’ under <your app name> folder
Once on the “Info.plist” file, hover your mouse cursor over the list and right-click on it. Then, on the popup menu click on the “Add Row”. A new row will be created. Hopefully!
Add “BUILD_DEV” in the Key (left) column and ${BUILD_DEV} or $(BUILD_DEV) in the Value (right) column. Either should work!
Access the “User-Define” values from your code.
Great! One last step and you should be able to have a fully working example. In this case, I will access the user-defined setting value using Swift.
Create a new Swift file. I will name mine Environment.
Copy and paste the code below.import Foundation
import Foundation

struct Environment {
    enum State: String, CaseIterable {
        case debug
        case test
        case release
    }

    struct Config: Decodable {
        private enum CodingKeys: String, CodingKey {
            case BUILD_ENV
        }

        let BUILD_ENV: String
    }

    static let state: State = {
        guard let url = Bundle.main.url(forResource: "Info", withExtension: "plist") else { return .release }
        guard let data = try? Data(contentsOf: url) else { return .release }
        guard let config = try? PropertyListDecoder().decode(Config.self, from: data) else { return .release }

        return State(rawValue: config.BUILD_ENV) ?? .release
    }()
}
The code above is straightforward. It defines a State enum with three values. Creates a state property that returns the current build configuration environment.
In case something goes wrong, the state will default to release.
print(Environment.state) // Will print "debug" as my current build configuration is set to DebugBy adding the code above anywhere in your project, once called, it will print your current build configuration.
In Conclusion
This article shows only one aspect of how you can utilize user-defined settings.
You can use this setup or any other combination in this article and set up your project according to your needs. Something I always do, wherever I see fit, is to create a different API URL for every build configuration.
I hope you enjoyed this one!